Barracks: Difference between revisions
Jump to navigation


No edit summary |
No edit summary |
||
| (2 intermediate revisions by the same user not shown) | |||
| Line 1: | Line 1: | ||
<br> | |||
[[File:BarracksMenu.png|center|link=]] | |||
<br> | |||
<font size="+0.5">The barracks is where you recruit your foot soldiers for both defence and offence. Recruiting units is essential to doing well in Tribal Wars.</font> | |||
<br> | |||
<br> | |||
[[File:Watchtowerhow.png|center|link=]] | |||
<br> | |||
<font size="+0.5"> | |||
<ul> | |||
<li>For each level you upgrade the barracks, your units will be recruited a bit faster!</li> | |||
<li>In addition to recruiting units, you can also decommission them if you need farm space or want to recruit other units.</li> | |||
</li> | |||
</ul></font> | |||
<br> | |||
[[File:menudetails.png|center|link=]] | |||
<br> | |||
<table class="building_levels"> | <font size="+0.5"> | ||
'''REQUIRED TO BUILD :''' [https://help.tribalwars.net/wiki/Village_Headquarters HQ] Level 3 | |||
<br> | |||
</font> | |||
<br> | |||
<table class="building_levels" style="width: 700px; margin: 0 auto"> | |||
<tr> | <tr> | ||
<th>Level</th><th width=" | <th><b>Level</b></th><th width="350"><b>Requirements</b></th><th width="250"><b>Pop needed / Pop total</b></th> | ||
<th> | <th width="160"><b>Speed Factor</b></th></tr> | ||
<tr> | <tr> | ||
< | <th>1</th> | ||
< | <th>{{Res|200|170|90}}</th> | ||
< | <th>{{Workers|7|7}}</th> | ||
< | <th>63%</th> </tr> | ||
<tr> | <tr> | ||
< | <th>2</th> | ||
< | <th>{{Res|252|218|113}}</th> | ||
< | <th>{{Workers|1|8}}</th> | ||
< | <th>59%</th> </tr> | ||
<tr> | <tr> | ||
< | <th>3</th> | ||
< | <th>{{Res|318|279|143}}</th> | ||
< | <th>{{Workers|2|10}}</th> | ||
< | <th>56%</th> </tr> | ||
<tr> | <tr> | ||
< | <th>4</th> | ||
< | <th>{{Res|400|357|180}}</th> | ||
< | <th>{{Workers|1|11}}</th> | ||
< | <th>53%</th> </tr> | ||
<tr> | <tr> | ||
< | <th>5</th> | ||
< | <th>{{Res|504|456|227}}</th> | ||
< | <th>{{Workers|2|13}}</th> | ||
< | <th>50%</th> </tr> | ||
<tr> | <tr> | ||
< | <th>6</th> | ||
< | <th>{{Res|635|584|286}}</th> | ||
< | <th>{{Workers|2|15}}</th> | ||
< | <th>47%</th> </tr> | ||
<tr> | <tr> | ||
< | <th>7</th> | ||
< | <th>{{Res|800|748|360}}</th> | ||
< | <th>{{Workers|3|18}}</th> | ||
< | <th>44%</th> </tr> | ||
<tr> | <tr> | ||
< | <th>8</th> | ||
< | <th>{{Res|1008|957|454}}</th> | ||
< | <th>{{Workers|3|21}}</th> | ||
< | <th>42%</th> </tr> | ||
<tr> | <tr> | ||
< | <th>9</th> | ||
< | <th>{{Res|1271|1225|572}}</th> | ||
< | <th>{{Workers|4|25}}</th> | ||
< | <th>39%</th> </tr> | ||
<tr> | <tr> | ||
< | <th>10</th> | ||
< | <th>{{Res|1601|1568|720}}</th> | ||
< | <th>{{Workers|4|29}}</th> | ||
< | <th>37%</th> </tr> | ||
<tr> | <tr> | ||
< | <th>11</th> | ||
< | <th>{{Res|2017|2007|908}}</th> | ||
< | <th>{{Workers|5|34}}</th> | ||
< | <th>35%</th> </tr> | ||
<tr> | <tr> | ||
< | <th>12</th> | ||
< | <th>{{Res|2542|2569|1144}}</th> | ||
< | <th>{{Workers|5|39}}</th> | ||
< | <th>33%</th> </tr> | ||
<tr> | <tr> | ||
< | <th>13</th> | ||
< | <th>{{Res|3202|3288|1441}}</th> | ||
< | <th>{{Workers|7|46}}</th> | ||
< | <th>31%</th> </tr> | ||
<tr> | <tr> | ||
< | <th>14</th> | ||
< | <th>{{Res|4035|4209|1816}}</th> | ||
< | <th>{{Workers|8|54}}</th> | ||
< | <th>29%</th> </tr> | ||
<tr> | <tr> | ||
< | <th>15</th> | ||
< | <th>{{Res|5084|5388|2288}}</th> | ||
< | <th>{{Workers|9|63}}</th> | ||
< | <th>28%</th> </tr> | ||
<tr> | <tr> | ||
< | <th>16</th> | ||
< | <th>{{Res|6406|6896|2883}}</th> | ||
< | <th>{{Workers|11|74}}</th> | ||
< | <th>26%</th> </tr> | ||
<tr> | <tr> | ||
< | <th>17</th> | ||
< | <th>{{Res|8072|8827|3632}}</th> | ||
< | <th>{{Workers|12|86}}</th> | ||
< | <th>25%</th> </tr> | ||
<tr> | <tr> | ||
< | <th>18</th> | ||
< | <th>{{Res|10170|11298|4577}}</th> | ||
< | <th>{{Workers|15|101}}</th> | ||
< | <th>23%</th> </tr> | ||
<tr> | <tr> | ||
< | <th>19</th> | ||
< | <th>{{Res|12814|14462|5767}}</th> | ||
< | <th>{{Workers|17|118}}</th> | ||
< | <th>22%</th> </tr> | ||
<tr> | <tr> | ||
< | <th>20</th> | ||
< | <th>{{Res|16146|18511|7266}}</th> | ||
< | <th>{{Workers|20|138}}</th> | ||
< | <th>21%</th> </tr> | ||
<tr> | <tr> | ||
< | <th>21</th> | ||
< | <th>{{Res|20344|23695|9155}}</th> | ||
< | <th>{{Workers|24|162}}</th> | ||
< | <th>20%</th> </tr> | ||
<tr> | <tr> | ||
< | <th>22</th> | ||
< | <th>{{Res|25634|30329|11535}}</th> | ||
< | <th>{{Workers|27|189}}</th> | ||
< | <th>19%</th> </tr> | ||
<tr> | <tr> | ||
< | <th>23</th> | ||
< | <th>{{Res|32298|38821|14534}}</th> | ||
< | <th>{{Workers|32|221}}</th> | ||
< | <th>17%</th> </tr> | ||
<tr> | <tr> | ||
< | <th>24</th> | ||
< | <th>{{Res|40696|49691|18313}}</th> | ||
< | <th>{{Workers|38|259}}</th> | ||
< | <th>16%</th> </tr> | ||
<tr> | <tr> | ||
< | <th>25</th> | ||
< | <th>{{Res|51277|63605|23075}}</th> | ||
< | <th>{{Workers|44|303}}</th> | ||
<th>16%</th> </tr> | |||
</table> | </table> | ||
<br><font size="+0.5"> | |||
[[File:Faq.png|center|link=]] | |||
<br> | |||
'''Why can't I build more units?''' - You can only build as many units as you have farm space. This includes those in the queue - so if you cannot build any more you may need to upgrade your farm! | |||
'''The recruitment speed is faster than suggested''' - Active buffs that impact recruitment times stack on top of your barracks level bonus! | |||
Latest revision as of 20:39, 8 July 2019

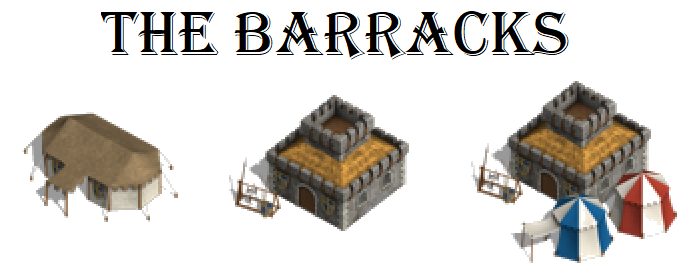
The barracks is where you recruit your foot soldiers for both defence and offence. Recruiting units is essential to doing well in Tribal Wars.

- For each level you upgrade the barracks, your units will be recruited a bit faster!
- In addition to recruiting units, you can also decommission them if you need farm space or want to recruit other units.

REQUIRED TO BUILD : HQ Level 3
| Level | Requirements | Pop needed / Pop total | Speed Factor |
|---|---|---|---|
| 1 | 63% | ||
| 2 | 59% | ||
| 3 | 56% | ||
| 4 | 53% | ||
| 5 | 50% | ||
| 6 | 47% | ||
| 7 | 44% | ||
| 8 | 42% | ||
| 9 | 39% | ||
| 10 | 37% | ||
| 11 | 35% | ||
| 12 | 33% | ||
| 13 | 31% | ||
| 14 | 29% | ||
| 15 | 28% | ||
| 16 | 26% | ||
| 17 | 25% | ||
| 18 | 23% | ||
| 19 | 22% | ||
| 20 | 21% | ||
| 21 | 20% | ||
| 22 | 19% | ||
| 23 | 17% | ||
| 24 | 16% | ||
| 25 | 16% |

Why can't I build more units? - You can only build as many units as you have farm space. This includes those in the queue - so if you cannot build any more you may need to upgrade your farm!
The recruitment speed is faster than suggested - Active buffs that impact recruitment times stack on top of your barracks level bonus!
